Friday, 30 January 2015

The B&W Project - Challenge #3 - Tools of the Trade

Tools of the trade the next challenge in the #BWProject26. hmmm, nothing to exciting for someone in IT field. To try and fit in with the goals of using flash and liquids there was only one option throwing water on a keyboard or mouse. The mouse option would probably have been slightly less interesting with less things for the water to splash off.

The next thing was to find a dead keyboard, having thrown out a keyboard which had been ruined by coffee mid last year. I briefly contemplated purchasing a cheap $5 keyboard but it seemed a little wasteful to ruin a brand new keyboard just for a photo so it was lucky that I found a dead keyboard in the office.

So since starting this project I had ordered some cheap soft boxes and some clamping style flash mounts for the soft boxes and all the bits arrived finally in time for this challenge. Everything seemed to fit relatively well together and it's interesting wrestling with the soft boxes trying to assemble them without "incapacitating" myself. But once it's all together it all seems to work as I expected (rightly or wrongly).

So the next major goal was where to setup and how to set it all up so that there would as little permanent damage as possible from the splashing water, so it was to the kitchen and commandeering the kitchen table and the kitchen.

Once things were setup there was a lot of trial an error placing the soft boxes the keyboard and seeing what worked best before any water was stilt. Initially i was trying to get the table as the base for the keyboard but that was just not going to work splashing water all over it and I didn't have anything large enough or photogenic enough to cover the whole table top. I remembered a sheet of clear acrylic plastic lying around waiting to be used in another project non photographic project and I figured it would give a nice reflection to sit the keyboard on that, but being clear it also gave a very clear view of everything under it as well.

While looking at the keyboard sitting on the acrylic I noticed that there would also not be an easy way to crop anything that the acrylic was sitting on so I found some boxes from a recent PC build and used those to prop up the acrylic sheet off the table. Next step was trying to get something with a nice solid color under the acrylic and I found a black cloth which under the acrylic gave a really nice reflective top to work on.

So after about 50 or so test shots moving lights, trying different backgrounds I had established ground zero.
Ground zero.

There was no turning back once the water starts flying....

I was shooting tethered using Olympus Capture and didn't want to have the laptop next to the splash down area so I used a wireless mouse to trigger the computer to take the shot. Just when you think you can introduce any more lag into a system you add a wireless mouse.

So pressing the left button on the mouse clicked the button on Olympus Capture which then sent the signal to the camera which also triggered the wireless flashes, yay...

So now the "easy" part, time everything perfectly to get enough water and splashes in the image. about 20 shots later and 5 or 6 glasses of water later I lucked out and got something which I was fairly happy with. There were a few shots with nothing in the frame at all, some with water just entering the frame, some with only a few drips in the air. It's just part of the fun.

Once I was happy with the shot there was the worst part of the job to do, the big cleanup, this is where I was beginning to regret selecting liquid photography to try out ;-). About 45 minutes later it was time to look at Lightroom and see what needed to be tweaked.

Processing....

Once I'd settled into the Lightroom editing it was relatively easy to process the setup was already fairly monochromatic and thankfully there was only some minor tweaks to do in Lightroom with a hint of the Liquify filter used in Photoshop to straighten out the back of the acrylic as it had sagged a little with all the water on it, and then removing some extraneous droplets that felt out of place.

The result was this.

1/250 sec, f7.1, ISO 400, 27mm
No more regrets choosing liquid photography now.

The setup....

This is a photo of the setup taken quickly before the cleanup with the phone. There was a soft box on either side of the keyboard one from slightly above, another on the floor behind the table pointing up at the white wall.


Not a lot of room but it seemed to work out and even managed not to knock over the camera tethered to the laptop on the kitchen bench just below the bottom of the photo.

Equipment....
  • Camera: Olympus OMD E-M1
  • Lens: Olympus 12-40mm f2.8
  • Triggers: Pixel Opas
  • Flashes: 3 x Vivitar cheapies.
  • Stands, clamps, soft boxes: ebay cheapies.

Lessons...
  • Try to plan things out a little more ahead of time and look at what might be needed as far as materials to water "proof" the area.
  • Look at better flashes the recharge time is quite long and the consistency between shots with the cheap flashes leaves a bit to be desired. Maybe better batteries or try to rig up a power pack.
  • More water protection = less cleanup (hopefully).
  • More room would be awesome.
hmmmm wonder what the neighbors would think of doing this outdoors at night and setting flashes off every minute or so... 

Bring on the next challenge.

Friday, 16 January 2015

The B&W Project - Challenge #2 - Macro

Not being one for letting a lack of knowledge or experience hold me back from trying something completely new to me and armed with all the knowledge gleamed from watching a few introductory videos on youtube from Alex Koloskov I decided to jump in and go for gold and this is the result.


Once I had the idea of what I wanted to try and about an hour worth of setup I had a dinning table filled with the following gear:
  • 3 fairly cheap flashes (Over kill? Probably, but all or nothing.)
  • tracing paper used as a diffuser on each flash
  • cheap wireless triggers
  • a small poly-carbonate mirror used as the drop zone
  • a gorilla pod
  • Olympus OM-D EM-1
  • Olympus 12-50mm in macro mode
  • laptop connected to the EM-1 with Olympus Capture
  • glass full of water
  • eye dropper
  • towels to cleanup the excessive splashes
So once the gear was all laid out it was time to actually try to make it work together, while the Capture software was installing I went through the flashes setting them all up in manual mode so I could control the amount of power each would put out.

The camera was next I'd only picked it up the day before and had only updated the firmware and played around a little with it but that bit was relatively easy enough, connected the wireless triggers to the hotshoe and everything came to life.

The software takes a bit of getting used to and will need a bit more work to see if it can be a little easier to use, or maybe setup a bit differently to make it easier, I have used Adobe Lightroom with my Canon 5D and it was so easy to work with, time will tell with the Capture software.

So after about 15 minuted of taking test shots and adjusting the power of the flashes to try and get a reasonably lit scene it was time to try and capture the drops, I was expecting this to take a bit of time out of all the expectations I had this one was the most accurate. Getting the timing right took a while and after about 80 shots I was getting close, but would either capture the drop after it hit and there were just ripples or just before it hit.

At this point I also started to notice that the flashes were not outputting the same amount of light each time if I didn't wait a minute or so between shots, trying to take 5 or so shots in a minute was causing each shot to be progressively underexposed, even with the flashes set to 1/2 and 1/4 power. So this slowed things down a little but probably a good thing as well as I could try and get the technique a little better.

So eventually after about 180 shots I managed to grab the first "splash" that inspired a bit more confidence. After another 30 of so shots I managed to get 3 or 4 more splashes and at that point decided to call it a night, and a have a quick go at processing the handful of images that looked interesting.

From looking at the images and going through the exercise there are a few things which I will hopefully learn for next time.
  • macro lenses have a very, very shallow depth of field (this was almost another first for me having only taken 3 or 4 macro shots before while testing the lens)
  • water drops are very hard to line up in the air and made to fall in the exact place where you focused
  • setting up the lighting with moving and sometimes illusive subjects is not at all easy
  • biggest one is probably more time, although it's a bit more interesting winging it and see what you can do, playing around a bit more would work out much better
In the process of getting to this image I noticed how the drop of water were beading and holding themselves together around the main drop I was aiming for, this lead me to try placing drops on the mirror purposefully to see what I could get, the image in the heading of this blog is the result.

As far as the actual image that came from the session goes, the depth of field is not right, the focus is to far back for where the drop fell. It would probably have been better with a more pure white background. Maybe shot more from above would define the splash "crown" like structure more. Using a glass full of water instead of a hard mirror would also have provided a cleaner background for the splash.

But if it was perfect now there would be no point trying again.

Thursday, 15 January 2015

New beginnings

Earlier this year I decided to give a year long photographic project a go, unlikely to finish it but should be an interesting learning experience. The project is The B&W Project on Google+, the aim is to take 26 photos in Black & White on a theme announced 2 weeks before the due date of the images.

The first theme was "New Beginnings" the aim to post an image which would explain a goal that you could work on during the year long project. I chose the following image:

New Beginnings

I have always wanted to try liquid, splash, droplet, etc photography, and I have always had an aversion to using flashes or artificial light in photos mainly due to seeing it as a huge, scary, nasty beast. So this was a good opportunity to try a couple of things I had never done and hopefully learn something new. It's much easier to learn something you already know.

Lets see what the second challenge brings and what I manage to get done....

Wednesday, 26 January 2011

Hobbyking ParkJet

The maneuverability of this plane is incredible, even though it only has 2 control surfaces and is only 3 channels it is super responsive and can do some incredibly fast rolls and loops.

It comes with a channel mixer if your radio doesn’t allow you to set up for elevons (combined elevators and ailerons) and a motor and esc all ready to go, just add a receiver (in this case a small Hobbyking DSM2 compatible parkflyer receiver) and a battery and your good to go.

The best thing about this plane is also that it’s extremely resilient and easy to fix, after the crash the wing broke off the motor mount broke off and all were fixed in a couple of hours with some 5 minute epoxy and was ready to go again the next day.

Lots of people are replacing the included esc and motor with more powerful versions for better performance and I will be doing the same thing shortly, cant wait for more speed.

This is a brilliant little plane and great to just have some fun with.


Wednesday, 29 December 2010

HobbyKing GoKart Driving Impressions


Well finally been able to edit the video and post it online, unfortunately the first and only videoed outing was in a car park where the grip and surface just didn’t do the GoKart justice.

As can be seen it’s a bit of a handful in corners but as it later turns out this was mainly due to the surface.


After this outing I did run it at the Bendigo RC Track which is quite high grip and the handling of the GoKart was transformed, instead of being really loose in the rear it actually under-steered a little and I found myself wishing for more steering, which is the opposite of the first outing.

The extra grip on the track really allowed the rear tyres to work and push the GoKart along very nicely, I think after a few runs you could actually get a setup for these that would allow you to race them quite competitively in a class, which would look awesome.

The only downside of running it on the track was that the steering servo gave up in the end and stripped the gears I’ll be replacing it with this little gem Turnigy MG959 Alloy Digital Metal Gear Servo its way over kill but it’s alloy and blingy, pitty it’s not in the Turnigy orange colour of the out runner motors.

Overall this GoKart is awesome value for money and could be quite and interesting car for it’s own class.

Friday, 3 December 2010

HobbyKing GoKart Initial Review

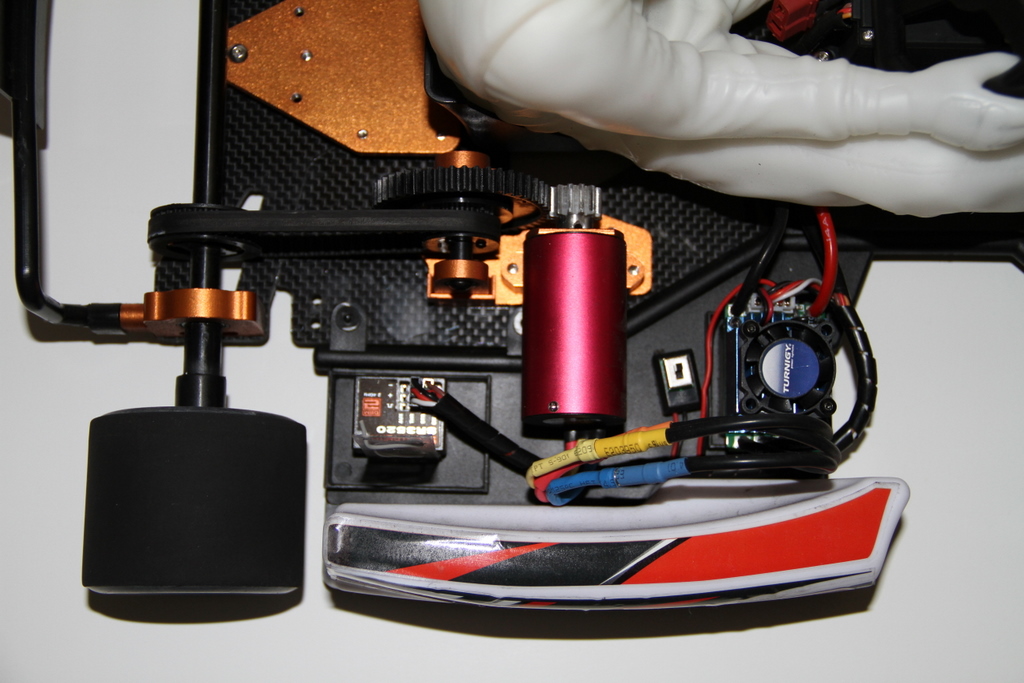
On first impression the Gokart looks fantastic, the scale, the chassis, the driver figure obvious nickname The Stig. The front and rear bumpers as well as the side pods look great although strictly speaking the side pods are not quite the same mounting as a real Gokart it really doesn’t detract from the over all look of the car.


Construction is very good, everything including the steering is setup on bearings which makes it nice and smooth, the orange alloy is quite good a bit different from the other standard alloy colours, the carbon fiber chassis is around 4mm thick and looks quite good. The chassis is setup a lot like an old school pan car with the rear drive train being mounted on a carbon fiber T-piece which is connected to the main chassis via the large diamond shaped block behind the driver seat, adjustments available here are the tighness of the bond between front and rear chassis plus tweek via the 2 screws that go in from the top of the diamond shaped alloy piece.

The motor is mounted on the main part of the chassis and is connected to the rear drive wheels via a belt, the belt and gears appear to be large Nitro Mod1 or 32 pitch type so should be fairly sturdy. Just like a real Gokart this one has a solid rear axle, this makes it fun to drive it makes it easier for the kart to over steer quite easily so a smooth throttle application is needed but this is also an advantage if you can use it to get around corners faster. This becomes less of an issue as the rear tyres warm up and give more lateral grip.

The motor is 380 or 400size brushless motor and quite zippy running on 2S Lipo pack with a TR35A-V2 ESC, initially more power then is really necessary but once a setup is sorted out and you get used to driving it more power could be nice. With the default gearing the motor response was smooth and responsive not even a hint of cogging on the motor which can happen with sensor-less brushless system on cars geared to high.

The servo that comes with the car is ok but with the size of the contact patch of the from tyres a higher torque servo would probably not go astray.

The only downside of the cart seems to be the decal sheet that comes with the car although it looks great before you apply the decals, as you apply them the lamination layer of the decals seems to peel off or lift off in areas making it look cheap and nasty, some good vinyl stickers would have been a much better option.

The whole kart comes fully assembled which is great, you open the box and it looks fantastic straight away, before running it however I would suggest pulling the whole thing apart and reassembly it using some sort of thread lock to stop any screws holding carbon to alloy or alloy to alloy coming undone and falling out as you drive around, not having any real suspension there is a lot of vibration working at the screws to loosen them up. Being quite a simple construction this should not take very long at all, it will also familiarize you with the kart so you can repair things as needed. 

The 2 tweek screws are particularly at risk from comming undone due to vibration here I think using an o-ring on either side of the diamond shapped alloy piece and screwing the tweek screws through the o-rings would hold them in place quite safely.

The test drive was great initially the car was quite loose and required some smooth throttle control but as confidence and temperature in the tyres increased it became easier to accelerate out of corners and reach some good speeds, it was during the test drive that I discovered that I should have pulled the Gokart apart and used some thread lock on the screws, now I have to wait for spares to replace the upper king pin screw on the front steering.

In conclusion this think is awesome the couple of downsides are easy to work around compared to how good this thing is overall and having a field of these running around a race track would be a great sight, hopefully it will happen soon ðŸ˜‰

Tuesday, 30 November 2010

Learning to Fly 2


Still to many bad habits from racing rc cars on road but slowly getting there.