The new v4.0 firmware for the Olympus E-M1 updated many things and provided a few new functions, the focus bracketing and stacking were ones I was really looking forward to playing.
Last night for comparison I tried taking a photo of a tiny flower in the standard way with a macro as a basis for comparison, then upgraded the firmware on the camera and all my lenses wile I was at it.
The initial baseline image is this one with the expected shallow depth of field.
The thing I tried was the in camera Focus Stacking mode to my surprise the camera made no noise and I hadn't noticed a photo was taken untill I noticed the flashing red SD card symbol in the top left of the screen.
When you go into focus stacking or bracketing mode the camera automatically picks high speed silent shutter mode, cool.
As can be seen from the photo below the result was quite impressive although the furtherest back parts are not quite as sharp as the rest probably because I didn't adjust step distance for each photo, but very impressive for a first try.
The last thing to try out was the focus bracketing mode which gives a bit more control over the number of shots to take, so having a bit of a play around with different shot numbers I got the following image.
This one gave some really nice results being able to take 15 shots and cover from the tip of the front petal all the way back through the rest of the leaves.
This was the very first time I had attempted to do any sort of focus stacking in Photoshop and I was not 100% happy with the results as the auto stacking was not perfect, with a bit of tweaking it could be much better, I also tried Helicon Focus with the free demo for 30 days and it 2 struggled with the same things that Photoshop struggled with.
Conclusions
One thing I did not like was that I could not change the shooting mode away from what the bracketing mode had set, so I could not select the option to delay taking the photos just to let the camera settle down any movement in pressing the button. This could be mitigated by using the OIS app to trigger the photo, or there maybe even another option I did not find in my cursory look last night.
The other thing I noted was that I can probably get better results in the stacking software by setting up the subject a little different or with less depth if possible, this will require a bit of fiddling and playing to see what works best. I'm relatively new to macro photography so there is plenty to learn I guess.
Thursday, 26 November 2015
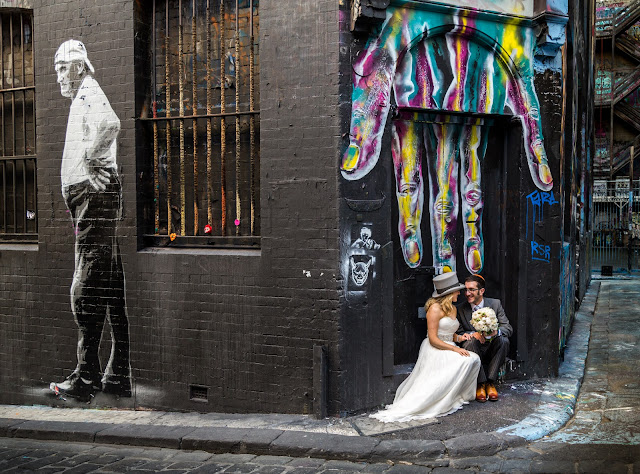
Graffiti and Weddings don't normally mix but....
Hosier Lane and likely many of Melbournes other graffiti covered lanes are not only a playground for tourists and photographers alike but have also become a very sought after location for wedding photographers.
Pretty much any weekend day if you hang around for a couple of hours you will come across a wedding photo shoot in there.
Quiet interesting to see the different styles of weddings and photographers that show up and direct the shoots, some are super organised with an entourage of assistants multiple shooters and tons of equipment and take over the place directing the public to stay out of their shots.
Others turn up with 2 photographers a couple of cameras and get it all done with minimal apparent effort and no interfering with the general public.
The cool thing from an enthusiastic amateur photographer point of view is that it adds a whole other side to taking photos in places like this and gives you willing subjects and situations which you can try out different kinds of photography that is perhaps outside of your normal style.
Subscribe to:
Posts (Atom)


